How to install Pex tubing in a hospital building?
Leave a message
Installing Pex tubing in a hospital building is a complex yet crucial task that requires careful planning, precision, and adherence to strict safety and regulatory standards. As a Pex tubing supplier, I have witnessed firsthand the importance of a well - executed Pex tubing installation in ensuring the efficient operation of a hospital's various systems, such as plumbing and heating. In this blog, I will guide you through the step - by - step process of installing Pex tubing in a hospital building.
1. Planning and Design
Before any installation work begins, a comprehensive plan must be developed. This involves collaborating with architects, engineers, and hospital administrators to understand the specific needs of the building. Consider the hospital's layout, the number of patient rooms, operating theaters, and other specialized areas. Determine the optimal routes for the Pex tubing to minimize bends and reduce pressure drops.
It is essential to account for future expansion and changes in the hospital's infrastructure. This may require leaving additional space for future tubing runs or incorporating flexible design elements. For example, if the hospital plans to add new patient wings in the future, the Pex tubing system should be designed to accommodate these expansions without major disruptions.
2. Material Selection
As a Pex tubing supplier, I understand the importance of choosing the right materials for the job. Pex tubing comes in different types, such as PEX - A, PEX - B, and PEX - C, each with its own unique properties. For hospital applications, PEX - A is often preferred due to its high flexibility, excellent chemical resistance, and ability to withstand high temperatures and pressures.
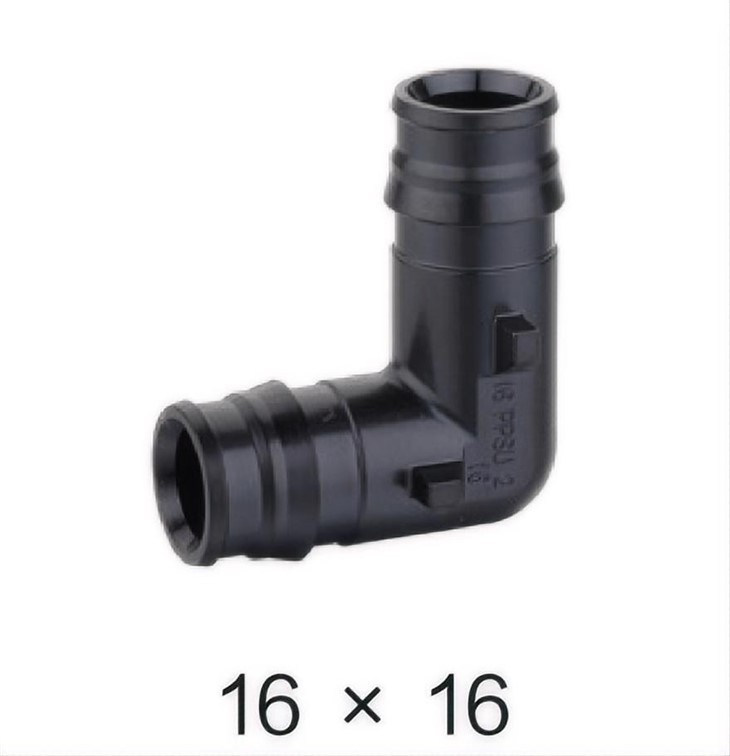
In addition to the Pex tubing itself, you will need a variety of fittings and accessories. For instance, Ppsu Elbow 90° is commonly used to change the direction of the tubing. These fittings should be made of high - quality materials that are compatible with Pex tubing to ensure a leak - free connection.
When selecting Pex tubing for floor heating systems in the hospital, PEX Pipe for Floor Heating is a great option. It provides efficient and uniform heating, which is essential for patient comfort. Also, PE - Xa Pipe ISO15875 meets international standards, ensuring its quality and reliability.
3. Preparing the Installation Site
The installation site must be properly prepared before the Pex tubing is installed. This includes cleaning the area to remove any debris, dirt, or sharp objects that could damage the tubing. Mark the locations for the tubing runs on the walls, floors, and ceilings according to the design plan.
If the Pex tubing is to be installed in a concrete slab, a layer of insulation should be laid down first. This helps to improve the efficiency of the heating system and prevent heat loss. In areas where the tubing will pass through walls or floors, holes should be drilled with the appropriate diameter to ensure a snug fit.
4. Installing the Pex Tubing
4.1. Tubing Runs
Start by unrolling the Pex tubing along the marked routes. Use hangers or straps to secure the tubing at regular intervals to prevent it from sagging or moving. When making bends, use proper bending tools to ensure smooth curves. Avoid sharp bends, as they can restrict the flow of water or other fluids and increase the risk of blockages.
In areas where multiple tubing runs are required, ensure that there is sufficient space between the tubes to allow for easy maintenance and inspection. If the tubing needs to cross over other pipes or electrical wires, use protective sleeves to prevent damage.
4.2. Connecting Fittings
Connect the Pex tubing to the fittings using the appropriate connection methods. There are several types of connections available, such as crimp connections, clamp connections, and push - to - connect fittings. Each method has its own advantages and disadvantages, so choose the one that is most suitable for the specific application.
For crimp connections, use a crimping tool to secure the crimp ring onto the tubing and fitting. Make sure the crimp ring is properly seated and the connection is tight. Check the connections for leaks using a pressure test after installation.
5. Testing the System
Once the Pex tubing is installed and all the connections are made, it is crucial to test the system to ensure its proper functioning. Conduct a pressure test by filling the system with water and pressurizing it to the recommended level. Check for any leaks at the connections, joints, and fittings.

In addition to the pressure test, perform a flow test to ensure that the water or other fluids can flow freely through the tubing. Monitor the temperature and pressure of the system to ensure that they are within the acceptable range. If any issues are detected during the testing phase, they should be addressed immediately before the system is put into use.
6. Insulation and Protection
After the system has passed the testing phase, it is important to insulate the Pex tubing to prevent heat loss and protect it from external damage. Use insulation materials that are suitable for the specific application, such as foam insulation or fiberglass insulation.
In areas where the tubing is exposed to extreme temperatures or physical damage, additional protection may be required. For example, in a hospital's mechanical room, the tubing may be covered with metal guards to prevent accidental impact.
7. Commissioning and Maintenance
Once the installation is complete and the system has been tested and insulated, it is time to commission the Pex tubing system. This involves starting up the system and adjusting the settings to ensure optimal performance. Train the hospital's maintenance staff on how to operate and maintain the system properly.
Regular maintenance is essential to keep the Pex tubing system in good working condition. This includes checking for leaks, inspecting the fittings and connections, and flushing the system to remove any sediment or debris. Schedule routine maintenance tasks at regular intervals to prevent major problems from occurring.
8. Compliance with Regulations
When installing Pex tubing in a hospital building, it is important to comply with all relevant regulations and codes. Hospitals are subject to strict health and safety regulations, and the Pex tubing system must meet these requirements. This includes using materials that are approved for use in healthcare facilities, ensuring proper ventilation, and maintaining the cleanliness of the system.
In addition, the installation process should follow local building codes and standards. Obtain the necessary permits before starting the installation work and have the system inspected by the relevant authorities upon completion.
In conclusion, installing Pex tubing in a hospital building is a multi - step process that requires careful planning, proper material selection, and strict adherence to safety and regulatory standards. As a Pex tubing supplier, I am committed to providing high - quality products and technical support to ensure a successful installation. If you are planning a Pex tubing installation project in a hospital or any other building, I encourage you to reach out to me for more information and to discuss your specific needs. Let's work together to create a reliable and efficient Pex tubing system for your facility.
References
- "Plumbing Engineering Design Handbook" by the American Society of Plumbing Engineers.
- "PEX Tubing Installation Guidelines" by the International Association of Plumbing and Mechanical Officials.
- "Hospital Building Design and Construction Standards" by the World Health Organization.


