How to install Pex tubing in a school building?
Leave a message
Hey there! As a Pex tubing supplier, I've seen firsthand how Pex tubing can revolutionize plumbing systems in school buildings. It's durable, flexible, and easy to install, making it a top choice for many educational institutions. In this blog, I'll walk you through the step-by-step process of installing Pex tubing in a school building.
Why Choose Pex Tubing for School Buildings?
Before we dive into the installation process, let's talk about why Pex tubing is a great option for school buildings. First off, Pex tubing is incredibly durable. It can withstand high pressures and extreme temperatures, which is crucial in a school environment where plumbing systems are constantly in use.
Secondly, Pex tubing is flexible. Unlike traditional copper or PVC pipes, Pex tubing can be bent and curved without the need for additional fittings. This makes installation faster and more cost-effective, saving both time and money.
Lastly, Pex tubing is resistant to corrosion and scale buildup. This means that it will last longer and require less maintenance over time, reducing the overall cost of ownership for the school.
Tools and Materials You'll Need
Before you start the installation process, you'll need to gather the necessary tools and materials. Here's a list of what you'll need:
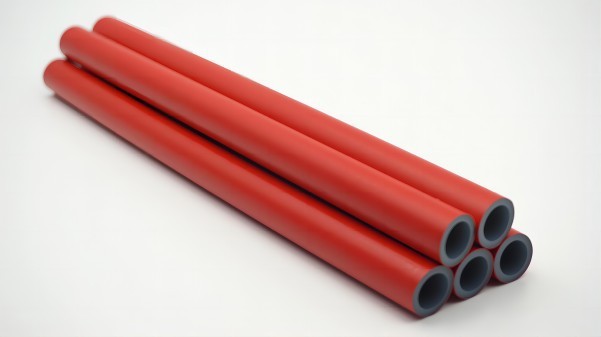
- Pex tubing: Make sure to choose the right size and type of Pex tubing for your project. You can check out PE-Xa Pipe for Plumbing Pipe for more options.
- Pex fittings: These are used to connect the Pex tubing together and to other plumbing fixtures.
- Pex crimping tool: This tool is used to secure the Pex fittings to the tubing.
- Measuring tape: To measure the length of the tubing needed for each section of the installation.
- Pipe cutter: To cut the Pex tubing to the correct length.
- Marker: To mark the tubing for cutting and fitting placement.
- Safety glasses and gloves: To protect yourself during the installation process.
Step 1: Plan Your Installation
The first step in installing Pex tubing in a school building is to plan your installation. This involves determining the layout of the plumbing system, including the location of the fixtures, the path of the tubing, and the placement of the fittings.
Start by creating a detailed sketch of the plumbing system. This will help you visualize the installation process and ensure that you have all the necessary materials and tools. Make sure to take into account any obstacles or restrictions in the building, such as walls, floors, or other plumbing systems.
Step 2: Prepare the Tubing
Once you have your plan in place, it's time to prepare the Pex tubing. Start by measuring the length of the tubing needed for each section of the installation. Use a measuring tape to get accurate measurements, and mark the tubing with a marker.
Next, use a pipe cutter to cut the tubing to the correct length. Make sure to cut the tubing at a 90-degree angle to ensure a proper fit with the fittings. After cutting the tubing, use a deburring tool to remove any rough edges or burrs from the cut end.
Step 3: Install the Fittings
Now that the tubing is prepared, it's time to install the fittings. Start by sliding a Pex crimp ring onto the tubing, followed by the fitting. Make sure the fitting is fully inserted into the tubing and that the crimp ring is positioned correctly.
Next, use a Pex crimping tool to secure the crimp ring to the tubing. Place the crimping tool over the crimp ring and squeeze the handles together until the tool clicks. This indicates that the crimp ring has been properly secured to the tubing.

Repeat this process for each fitting and section of tubing until the entire plumbing system is installed. Make sure to double-check each connection to ensure that it is secure and leak-free.
Step 4: Connect the Tubing to the Fixtures
Once all the fittings are installed, it's time to connect the tubing to the plumbing fixtures. This involves attaching the tubing to the faucets, toilets, showers, and other fixtures using the appropriate fittings.
Make sure to follow the manufacturer's instructions when connecting the tubing to the fixtures. This will ensure that the connections are secure and leak-free. After connecting the tubing to the fixtures, turn on the water supply and check for any leaks.
Step 5: Test the System
After the installation is complete, it's important to test the plumbing system to ensure that it is working properly. Start by turning on the water supply and checking for any leaks. If you notice any leaks, tighten the connections or replace the fittings as needed.
Next, check the water pressure and flow rate at each fixture. Make sure that the water pressure is consistent and that the flow rate is adequate. If you notice any issues with the water pressure or flow rate, adjust the valves or fittings as needed.
Step 6: Insulate the Tubing
Once the system has been tested and is working properly, it's a good idea to insulate the Pex tubing to prevent heat loss and freezing. This is especially important in areas where the temperature drops below freezing during the winter months.
You can use foam insulation sleeves or tape to insulate the tubing. Make sure to cover all exposed sections of the tubing, including the fittings and connections. This will help to keep the water in the tubing warm and prevent it from freezing.
Step 7: Maintain the System
Finally, it's important to maintain the Pex tubing system to ensure that it continues to work properly for years to come. This involves regularly checking the system for leaks, inspecting the fittings and connections, and replacing any worn or damaged parts.
Make sure to follow the manufacturer's recommendations for maintenance and care. This will help to extend the lifespan of the Pex tubing system and reduce the risk of costly repairs or replacements.
Conclusion
Installing Pex tubing in a school building is a relatively straightforward process that can be completed by anyone with basic plumbing skills. By following the steps outlined in this blog, you can ensure that your Pex tubing system is installed correctly and working properly.
If you have any questions or need further assistance with your Pex tubing installation, please don't hesitate to contact us. We're here to help you every step of the way. Whether you're looking for PE-Xa Pipe for Plumbing Pipe, PE-Xa Pipe NSF, or PEX Pipe for Floor Heating, we've got you covered.
We're always happy to discuss your project and provide you with the best solutions for your needs. So, if you're interested in purchasing Pex tubing for your school building, don't hesitate to reach out and start the procurement discussion.
References
- "Pex Tubing Installation Guide." Plumbing Supply Company.
- "How to Install Pex Tubing." DIY Plumbing Magazine.
- "Pex Tubing: A Comprehensive Guide." Plumbing Industry Association.


