How to install PE - Xa/EVOH Pipe correctly?
Leave a message
Hey there! I'm a supplier of PE-Xa/EVOH Pipe, and I've seen firsthand how crucial it is to install these pipes correctly. In this blog, I'll walk you through the steps to ensure a proper installation of PE-Xa/EVOH Pipe. So, let's dive in!
Understanding PE-Xa/EVOH Pipe
First things first, let's talk a bit about what PE-Xa/EVOH Pipe is. PE-Xa stands for cross-linked polyethylene of the peroxide method, and EVOH is ethylene-vinyl alcohol copolymer. This combination results in a pipe that's highly resistant to oxygen diffusion, has excellent flexibility, and can withstand high temperatures and pressures. You can find more info about PE-Xa/EVOH Pipe.
Pre - Installation Preparation
Before you start the installation, there are a few things you need to do.
Planning
Take a good look at the area where you'll be installing the pipes. Measure the lengths accurately and plan the route. Consider factors like the location of fixtures, the slope for proper drainage (if it's a plumbing system), and any potential obstacles. You don't want to run into problems halfway through the installation.


Gathering Tools and Materials
You'll need a set of tools for the job. Here's a basic list:
- Pipe cutters: These are essential for cutting the PE-Xa/EVOH Pipe to the right length. Make sure they're sharp and suitable for the pipe's diameter.
- Expansion tools: If you're using expansion fittings, you'll need an expansion tool. It helps to expand the end of the pipe so that the fitting can be inserted.
- Deburring tools: After cutting the pipe, there might be burrs on the edges. A deburring tool will smooth these out, ensuring a proper seal.
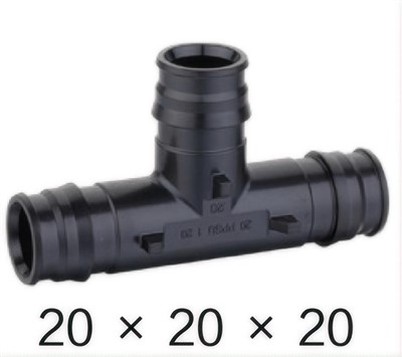
- Fittings: Get the right type and size of fittings for your installation. Whether it's elbows, tees, or couplings, make sure they're compatible with the PE-Xa/EVOH Pipe.
Also, gather all the PE-Xa/EVOH Pipe you'll need, and double - check the quantities.
Safety Precautions
Safety should always be a top priority. Wear safety glasses to protect your eyes from any flying debris when cutting the pipe. Gloves can also be helpful, especially when handling the expansion tools. If you're working in a confined space, make sure there's proper ventilation.
Cutting the Pipe
Once you've got everything ready, it's time to cut the pipe.
Measuring
Use a measuring tape to mark the pipe at the desired length. Be as accurate as possible, as even a small error can cause problems later.
Cutting
Place the pipe in the pipe cutter and tighten it until it grips the pipe firmly. Then, rotate the cutter around the pipe, applying gentle pressure. Keep rotating until the pipe is cut through. Remember, don't force it too hard, as it can damage the pipe.
Deburring
After cutting, use the deburring tool to remove any burrs from the inside and outside of the pipe ends. This is important because burrs can prevent a proper seal with the fittings.
Connecting the Fittings
There are a few different methods for connecting PE-Xa/EVOH Pipe to fittings.
Expansion Fittings
Expansion fittings are a popular choice. Here's how to use them:
- Insert the expander into the end of the pipe. Make sure it's fully inserted and then expand the pipe using the expansion tool. Hold the tool in place for a few seconds to let the pipe stretch to the right size.
- Quickly insert the fitting into the expanded end of the pipe. The pipe will contract around the fitting, creating a tight seal.
- Use a marker to make a small mark on the pipe near the fitting. This will help you check later if the pipe has shifted.
Compression Fittings
Compression fittings are another option.
- Slide the compression nut and the compression ring onto the pipe.
- Insert the pipe into the fitting body.
- Tighten the compression nut onto the fitting body using a wrench. Make sure not to over - tighten, as it can damage the seal.
Installation in the System
Now that you've cut the pipes and connected the fittings, it's time to install them in the system.
Plumbing Systems
If it's a plumbing system, start by connecting the pipes to the fixtures. Make sure the connections are tight and there are no leaks. If you're running the pipes through walls or floors, use proper hole saws to create holes of the right size. Seal the holes around the pipes to prevent water from seeping through.
Heating Systems
For heating systems, pay attention to the flow direction. Make sure the pipes are installed in the correct orientation so that the hot water or heating fluid can circulate properly. Insulate the pipes to reduce heat loss.
Testing the Installation
Once the installation is complete, it's crucial to test the system.
Pressure Testing
For plumbing systems, fill the system with water and increase the pressure to the recommended level. Check all the connections for leaks. You can use a soapy water solution and apply it to the connections. If there are bubbles, it means there's a leak.
Leak Detection
In heating systems, run the system and check for any signs of leaks. Look for wet spots around the pipes and fittings. If you find a leak, shut down the system immediately and fix it.
Maintenance Tips
After a successful installation, proper maintenance can extend the life of your PE-Xa/EVOH Pipe system.
- Regularly check the connections for any signs of wear or leaks.
- If the pipes are exposed to sunlight, consider using protective sleeves to prevent UV damage.
- In cold climates, make sure the pipes are insulated to prevent freezing.
Conclusion
Installing PE-Xa/EVOH Pipe correctly is not as difficult as it might seem. By following these steps, you can ensure a successful installation. If you have any questions or need more information about our PE-Xa/EVOH Pipe, don't hesitate to reach out. We're here to help you with your project and can offer great deals if you're looking to purchase. Whether it's a small home project or a large commercial installation, our pipes are up to the task.
References
- Plumbing Installation Handbook
- Heating System Installation Guide