How to install a 50mm PEX pipe in a factory?
Leave a message
Installing a 50mm PEX pipe in a factory is a significant task that requires careful planning, the right tools, and a solid understanding of the process. As a 50mm PEX pipe supplier, I've witnessed firsthand the importance of a proper installation to ensure the long - term functionality and efficiency of the piping system. In this blog, I'll guide you through the step - by - step process of installing a 50mm PEX pipe in a factory setting.
Pre - installation Preparation
Before you start the actual installation, it's crucial to make thorough preparations.
Design and Planning
First, you need to have a detailed design plan for the piping system. Consider the layout of the factory, the purpose of the pipe (whether it's for water supply, heating, or other applications), and any existing infrastructure. You should mark the route where the 50mm PEX pipe will be installed on the factory floor or walls. This helps to ensure that the pipe will be installed in the most efficient and effective way possible. For example, if it's a water supply system, you need to ensure that the pipe is routed to all the necessary areas without causing any interference with other equipment or structures.
Material and Tool Gathering
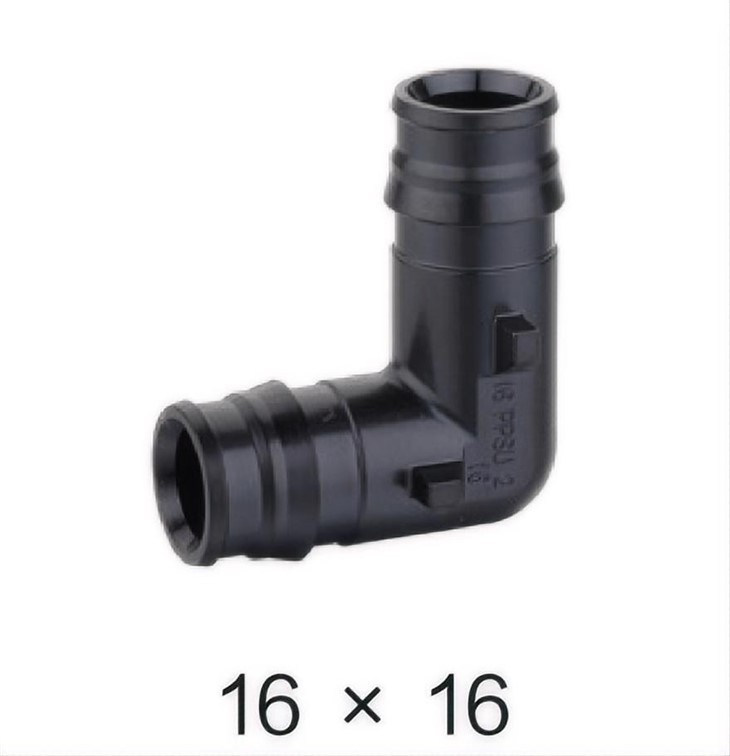
As a 50mm PEX pipe supplier, I recommend gathering all the necessary materials and tools in advance. You'll need the 50mm PEX pipes, appropriate fittings such as Ppsu Elbow 90°, couplings, and valves. Make sure to choose high - quality materials to ensure the durability and reliability of the system. Additionally, you'll need tools like a PEX pipe cutter, crimping tools, and a measuring tape. The PEX pipe cutter is used to cut the pipe to the required length accurately, while the crimping tools are essential for joining the pipes and fittings securely.
Safety Measures
Safety should always be a top priority. Provide safety equipment for all workers involved in the installation, including safety glasses, gloves, and hard hats. Ensure that the work area is well - ventilated, especially if you're using any chemicals or adhesives during the installation process. Also, make sure that all electrical equipment is properly grounded to prevent any electrical hazards.
Pipe Cutting
Once you've completed the pre - installation preparations, the next step is to cut the 50mm PEX pipes to the required lengths.
Measuring
Use a measuring tape to measure the exact length of the pipe needed for each section of the installation. Mark the pipe at the appropriate points using a permanent marker. Double - check your measurements to ensure accuracy, as any errors in measurement can lead to problems during the installation and may require additional cutting or adjustments later on.
Cutting
Use a PEX pipe cutter to make clean and straight cuts. Place the cutter around the pipe at the marked point and squeeze the handles firmly until the blade cuts through the pipe. Avoid using other tools like saws, as they may cause rough edges or damage to the pipe, which can affect the quality of the joint when connecting the pipes and fittings.
Pipe Fitting Installation
After cutting the pipes, it's time to install the fittings.
Fitting Selection
Choose the appropriate fittings based on the design of your piping system. For example, if you need to change the direction of the pipe, you can use Ppsu Elbow 90°. Make sure that the fittings are compatible with the 50mm PEX pipes in terms of size and material.
Joining Process
There are different methods for joining PEX pipes and fittings, and one of the most common methods is crimping. First, slide the crimp ring onto the pipe, then insert the fitting into the pipe until it reaches the proper depth. Use the crimping tool to crimp the ring around the pipe and fitting. Make sure that the crimp is tight and uniform to ensure a leak - proof connection. Another method is using expansion fittings, which involve expanding the end of the pipe using a special tool and then inserting the fitting. This method also provides a reliable and durable connection.
Pipe Installation
Now that the pipes are cut and the fittings are installed, it's time to install the pipes in the factory.
Mounting
Use pipe hangers or brackets to mount the pipes to the factory floor, walls, or ceilings. Make sure that the pipes are properly supported at regular intervals to prevent sagging or damage. The spacing of the hangers or brackets depends on the type of installation and the local building codes. For horizontal pipes, the hangers should be placed closer together to support the weight of the water or fluid inside the pipe.

Routing
Follow the pre - planned route for the pipes. Make sure that the pipes are routed in a way that avoids any sharp bends or kinks, as these can restrict the flow of fluid and cause pressure drops in the system. If you need to make a turn, use the appropriate fittings to ensure a smooth transition.
System Testing
After the installation is complete, it's essential to test the piping system to ensure that it's working properly.
Pressure Testing
Fill the system with water and pressurize it to the recommended level. Check for any leaks at the joints, fittings, and valves. If you find any leaks, mark the location and repair them immediately. Pressure testing helps to identify any potential problems in the system before it's put into full operation.
Flow Testing
Once the pressure testing is successful, test the flow of water or fluid through the system. Make sure that the flow rate is consistent and that there are no blockages in the pipes. You can use flow meters or other measuring devices to check the flow rate.
Maintenance and Troubleshooting
Even after a successful installation and testing, regular maintenance is necessary to ensure the long - term performance of the 50mm PEX pipe system.
Regular Inspections
Periodically inspect the pipes, fittings, and valves for any signs of wear, damage, or leaks. Check the crimped joints to make sure that they are still tight. Look for any corrosion or scaling inside the pipes, which can affect the flow of fluid and the efficiency of the system.
Troubleshooting
If you encounter any problems with the system, such as leaks or reduced flow, identify the cause of the problem. It could be due to a damaged fitting, a blocked pipe, or a problem with the pressure. Once you've identified the problem, take the appropriate steps to repair it.
In conclusion, installing a 50mm PEX pipe in a factory is a complex but achievable task. By following the steps outlined in this blog, you can ensure a successful installation. As a 50mm PEX pipe supplier, I offer high - quality PE - Xa Pipe ISO15875 and PEX Pipe for Floor Heating that are suitable for various factory applications. If you're interested in purchasing our products or have any questions about the installation process, please feel free to contact us for further discussion and procurement negotiation.
References
- "PEX Pipe Installation Guide", Plumbing Association of America
- "Industrial Piping System Design and Installation", Engineering Handbook for Factory Infrastructure


