How to install a 3/4 pex pipe in a mobile home?
Leave a message
Installing a 3/4 PEX pipe in a mobile home can be a rewarding DIY project that enhances your home's plumbing system. As a trusted 3/4 PEX pipe supplier, I've seen firsthand the benefits of using PEX pipes in mobile homes. They are flexible, durable, and resistant to freezing and bursting, making them an ideal choice for mobile home plumbing. In this blog post, I'll guide you through the process of installing a 3/4 PEX pipe in your mobile home, from planning to completion.
Planning Your Installation
Before you start installing your 3/4 PEX pipe, it's essential to plan your project carefully. This involves measuring the area where you'll be installing the pipe, determining the route it will take, and gathering all the necessary materials and tools.
Measuring the Area
Measure the length and width of the area where you'll be installing the PEX pipe. This will help you determine how much pipe you need to purchase. It's a good idea to add a little extra length to your measurements to account for any bends or turns in the pipe.
Determining the Route
Decide on the route the PEX pipe will take through your mobile home. Consider factors such as the location of existing plumbing fixtures, the path of least resistance, and any potential obstacles. Make sure the route is clear of any sharp edges or objects that could damage the pipe.
Gathering Materials and Tools
Once you've planned your installation, it's time to gather the necessary materials and tools. Here's a list of what you'll need:
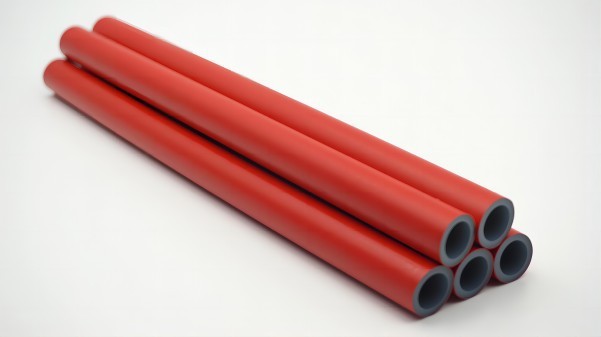
- 3/4 PEX pipe: You can find high-quality PE-Xa Pipe for Plumbing Pipe at our store. It's made from cross-linked polyethylene, which provides excellent strength and durability.
- PEX fittings: These include elbows, tees, couplings, and shut-off valves. Make sure to choose fittings that are compatible with your PEX pipe. We recommend using Ppsu Elbow 90° for smooth and reliable connections.
- PEX crimp rings or cinch clamps: These are used to secure the fittings to the PEX pipe.
- Crimping tool or cinch tool: Depending on the type of rings or clamps you choose, you'll need the appropriate tool to install them.
- Pipe cutter: A sharp pipe cutter will make clean, precise cuts in the PEX pipe.
- Tape measure: To measure the length of the pipe and ensure accurate cuts.
- Marker: To mark the locations where you'll be making cuts and installing fittings.
Preparing the Area
Before you start installing the PEX pipe, you need to prepare the area where it will be installed. This involves clearing the space of any debris, removing any old plumbing fixtures, and ensuring the surface is clean and dry.
Clearing the Space
Remove any furniture, appliances, or other objects from the area where you'll be working. This will give you plenty of room to move around and install the pipe safely.
Removing Old Plumbing Fixtures
If you're replacing an existing plumbing system, you'll need to remove the old fixtures and pipes. Turn off the water supply to the area and drain the pipes before you start. Use a pipe wrench or pliers to loosen and remove the fittings, and then carefully pull out the old pipes.
Cleaning the Surface
Clean the surface where the PEX pipe will be installed to ensure a good seal. Use a damp cloth to wipe away any dirt, dust, or grease, and then dry the surface thoroughly.
Cutting the PEX Pipe
Once you've prepared the area, it's time to cut the PEX pipe to the appropriate length. Use a sharp pipe cutter to make clean, precise cuts at the marked locations.

Measuring and Marking the Pipe
Use a tape measure to measure the length of the pipe you need, and then use a marker to mark the cutting point. Make sure the mark is clear and visible.
Cutting the Pipe
Place the pipe cutter around the PEX pipe at the marked location, and then tighten the cutter until it bites into the pipe. Rotate the cutter around the pipe, applying steady pressure, until the pipe is cut through. Make sure the cut is straight and perpendicular to the pipe.
Installing the Fittings
After you've cut the PEX pipe to the appropriate length, it's time to install the fittings. This involves sliding the crimp rings or cinch clamps onto the pipe, inserting the fittings, and then using the crimping tool or cinch tool to secure them in place.
Sliding on the Rings or Clamps
Slide a crimp ring or cinch clamp onto the end of the PEX pipe, making sure it's positioned about 1/4 inch from the end of the pipe.
Inserting the Fittings
Insert the fitting into the end of the PEX pipe, pushing it all the way in until it reaches the shoulder of the fitting. Make sure the fitting is straight and aligned with the pipe.
Securing the Fittings
Use the crimping tool or cinch tool to secure the ring or clamp around the fitting and the pipe. For crimp rings, place the tool over the ring and squeeze the handles together until the ring is compressed. For cinch clamps, use the tool to tighten the clamp around the fitting and the pipe.
Installing the PEX Pipe
Once you've installed the fittings, it's time to install the PEX pipe in your mobile home. This involves running the pipe along the planned route, securing it in place, and connecting it to the existing plumbing system.
Running the Pipe
Start at one end of the route and carefully run the PEX pipe along the path you've planned. Make sure the pipe is straight and free of any kinks or bends. Use your hands to gently bend the pipe around corners and obstacles, or use elbows and other fittings to make the necessary turns.
Securing the Pipe
Use pipe hangers or straps to secure the PEX pipe in place at regular intervals. This will prevent the pipe from moving or vibrating, which could cause leaks or damage over time. Make sure the hangers or straps are tight enough to hold the pipe securely, but not so tight that they damage the pipe.
Connecting to the Existing Plumbing System
Once the PEX pipe is installed and secured, it's time to connect it to the existing plumbing system. This may involve connecting the pipe to a water supply line, a drain line, or a plumbing fixture. Use the appropriate fittings and tools to make the connections, and make sure they are tight and leak-free.
Testing the System
After you've installed the PEX pipe and connected it to the existing plumbing system, it's important to test the system to make sure it's working properly. This involves turning on the water supply, checking for leaks, and adjusting the pressure if necessary.
Turning on the Water Supply
Turn on the main water supply to the area and allow the pipes to fill with water. Check for any signs of leaks at the connections and along the length of the pipe. If you notice any leaks, turn off the water supply and tighten the fittings or replace the damaged parts.
Checking for Leaks
Inspect the entire plumbing system for leaks, including the connections, fittings, and valves. Look for any signs of water dripping, pooling, or spraying. If you find a leak, mark the location and make the necessary repairs.
Adjusting the Pressure
If the water pressure in the system is too high or too low, you may need to adjust it. You can do this by turning the pressure regulator valve, which is usually located near the water meter. Follow the manufacturer's instructions to adjust the pressure to the recommended level.
Conclusion
Installing a 3/4 PEX pipe in a mobile home is a relatively straightforward process that can be completed by most DIYers with basic plumbing skills. By following the steps outlined in this blog post, you can install a new plumbing system or upgrade an existing one with confidence.
If you have any questions or need further assistance with your PEX pipe installation, don't hesitate to contact us. As a leading 3/4 PEX pipe supplier, we have the expertise and products you need to complete your project successfully. Whether you're a professional plumber or a DIY enthusiast, we're here to help you find the right solutions for your plumbing needs. Contact us today to discuss your requirements and explore our wide range of PE-Xa Pipe ISO15875 and other plumbing products. We look forward to working with you!
References
- "PEX Plumbing Systems: A Comprehensive Guide." Home Depot.
- "How to Install PEX Pipe." This Old House.
- "PEX Pipe Installation Manual." Manufacturer's guide.


